Team 5
Team members:
NTU
|
WSU
|
Brief Project Description/Introduction
Motivation:
In the first project, the teams will develop a BIM execution plan for the virtual team's design and construction sequence analysis of a multi-story residential building. The building is to be built to house people who have lost their homes in the recent floods that ravaged Chennai, India. In the second project, we want to place the structures in southern Taiwan (Shanlin, Kaohsiung). At there, the serious floods occurred and many villagers lost their houses. We are going to build houses that are easy to construct, and also can be completed as fast as possible
Project goal:
1. For the 3D Model: WSU will use the information from this session to develop a BIM project execution plan (BXP) and send it to NCKU. After receiving it, NCKU will develop the 3D models.
2. For the 4D Model: WSU will combine the 3D model and construction schedule to create a 4D construction simulation.
3. For Structural analysis: NTU will analyze the structures to check whether the structural capacity is sufficient.
4. For Quantity take-off: To estimate the cost, NTU will calculate the quantity and apply the reasonable unit-cost.
Process:
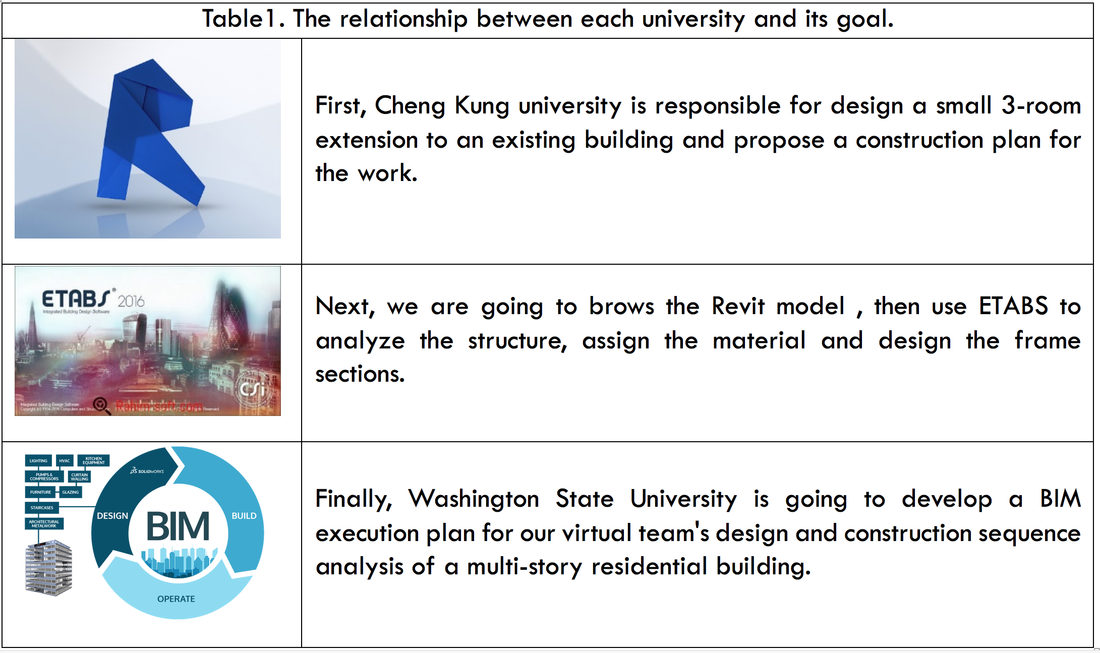
We separated our project into 3 parts, and each university is responsible for one of them. The following table shows the relationship between each university, its goal and the software
Project Results
Design Strategy
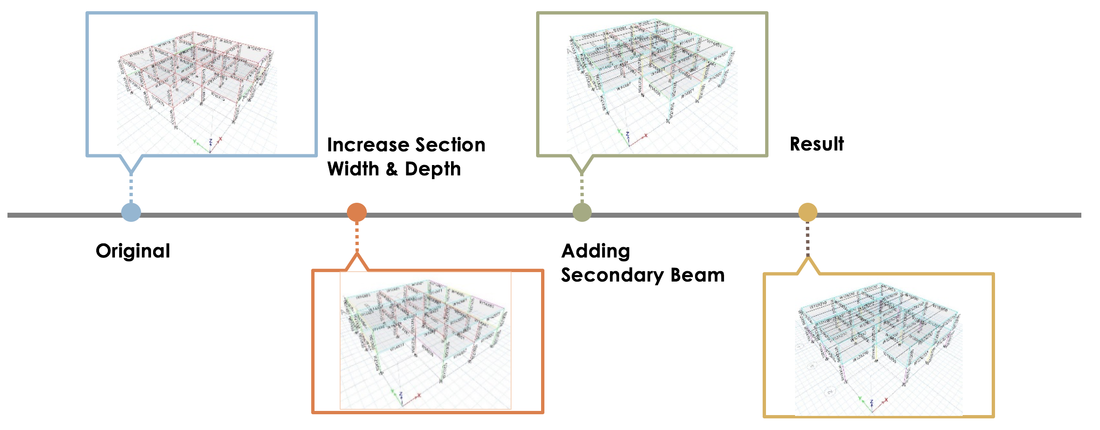
The process of our design strategy.
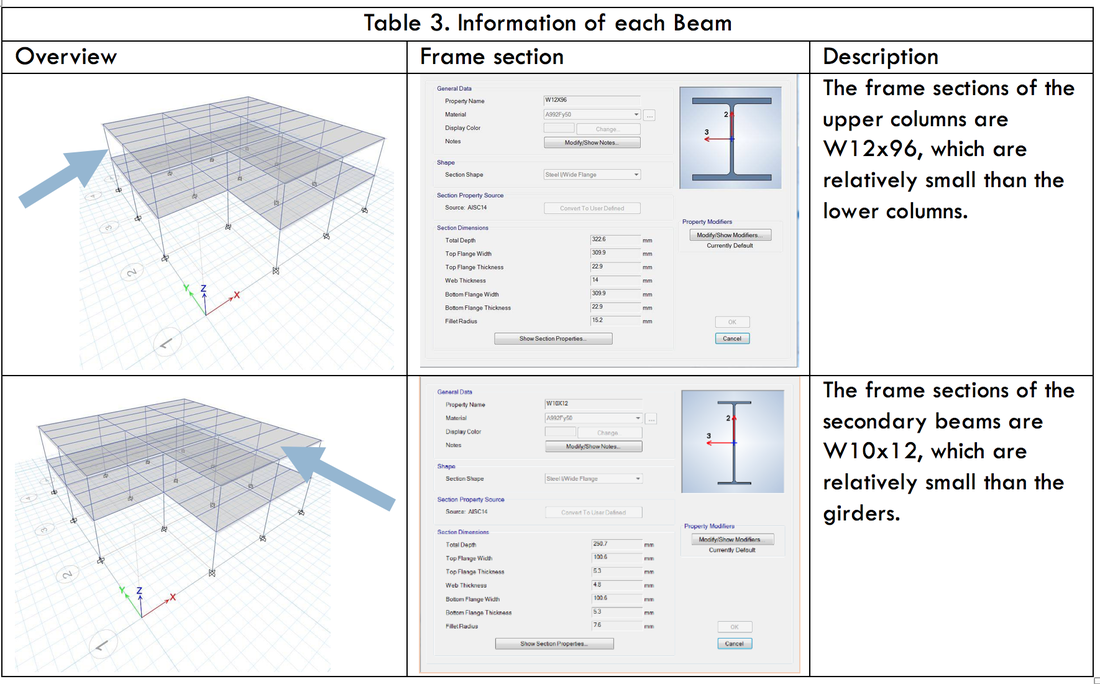
Form the picture above, let’s take the first model for example, after we add the columns and beams into the structure, we run the analysis and try to design and reinforce the structure. From our original model, we increase the section width and depth and run the analysis, and then we add some secondary beams. After several attempts, we can finally obtain our theoretically optimal model.
As you can see, the output of the original model contains many red on the frame, which means the steel ratio is close to 1.0 or even exceed 1.0. So we increase the section width and depth to increase structural strength. You can see the output is better than the original one, but still has some red frames. Our opinion is that if we increase the section width and depth to a certain degree, it will cause some difficulties in construction and it is also not economical. So we decide to add some secondary beams. To do so, it can share the loads with the girders. After many attempts, we finally make most of frames be blue and not exceed the purple.
Structural Analysis:
Live Load & Dead Load
We set our live load and super dead load to 2 and 0.2 kN per square meter respectively. We follow the Building Technique Regulation to set them up. In the seventeenth article, as you can see, it regulates that the minimum live load of the residential can’t lower than 200 kg per square meter, which is 2 kN per square meter. This is the reason we set the live load to 2.

Earthquake Load
The next is the earthquake load, because we have some trouble searching for the seismic parameters for Taiwan, we obtain them from the USGS website. We believe that the data is conservative enough to suit our models.
RESULT
After serval weeks’ hard work, we finally achieve the project goal. We separate the result into two different parts, including the design result and also the quantity take-off result.
Design Result:
Team #2
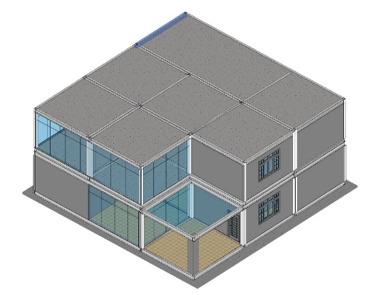
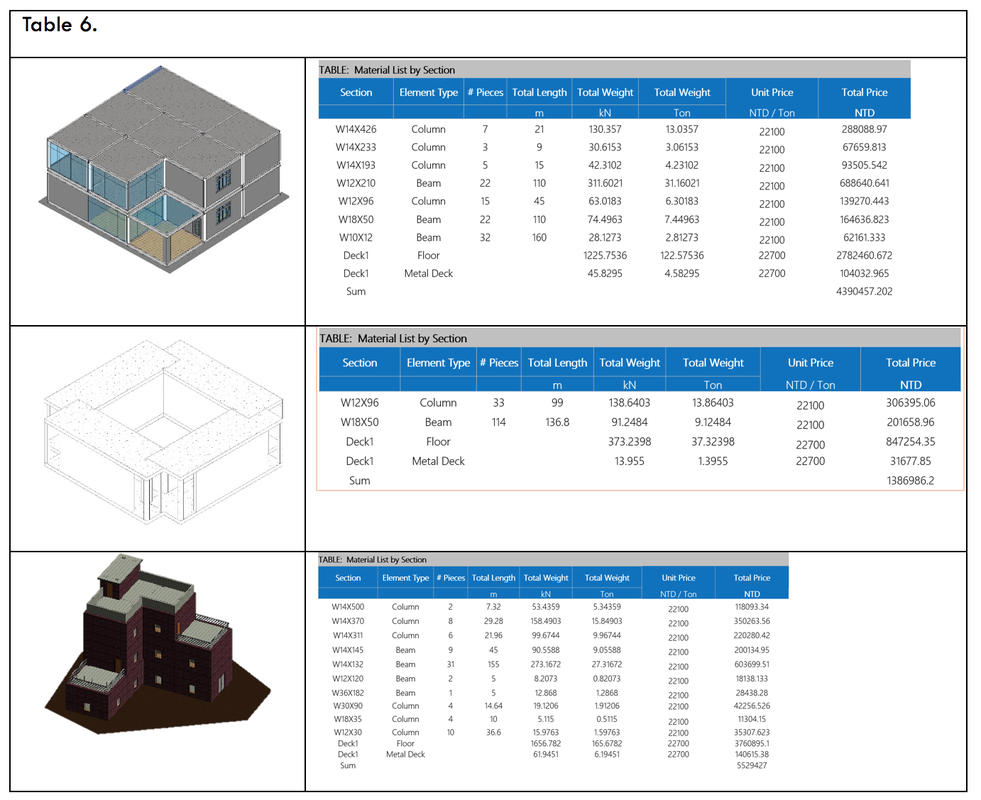
This is the Revit model done by Cheng Kung University. The structure has two stories and 16 rooms for the residential purpose.
Revit Model by team #2
|
Structure Design of team #2
|
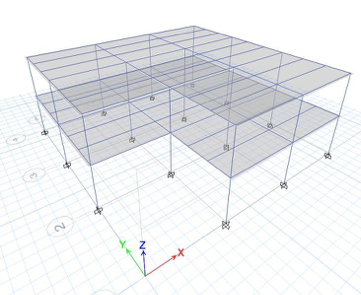
This is the ETABS model we made according to the REVIT model. We divided the plan into 9 sections to model it efficiently. Following is the information of each beams and columns. We choose the section with different reasons that is included in the table below.
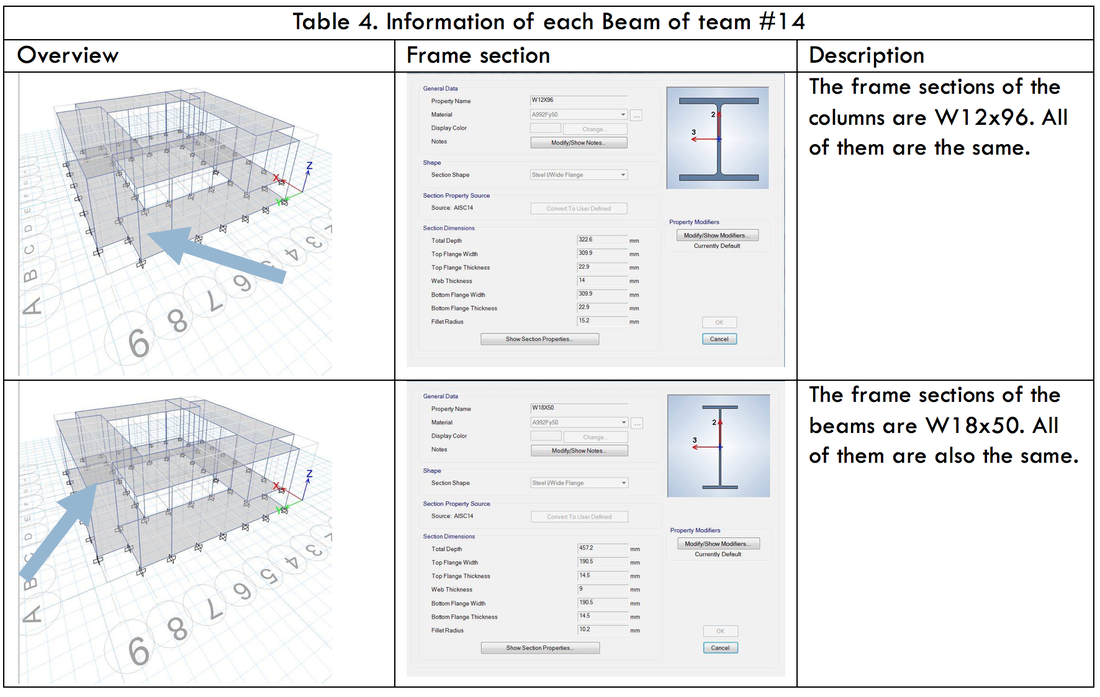
Team #14
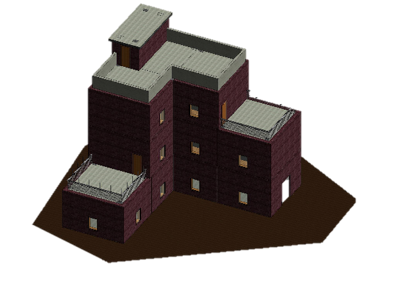
This is the Revit model done by Cheng Kung University. The structure has one stories and 4 rooms for the residential purpose.
Revit Model by team #14
|
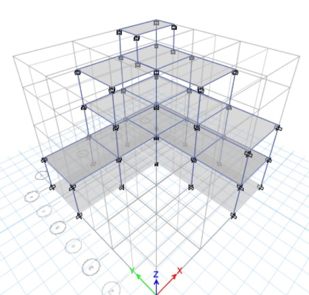
Structure Design of team #14
|
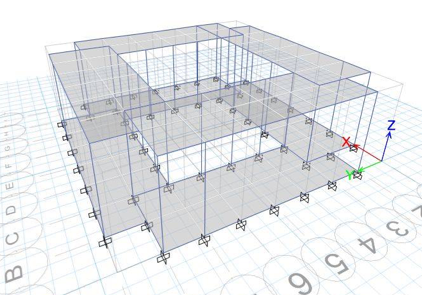
This is the ETABS model we made according to the REVIT model. We divided the plan into 64 sections to model it efficiently.
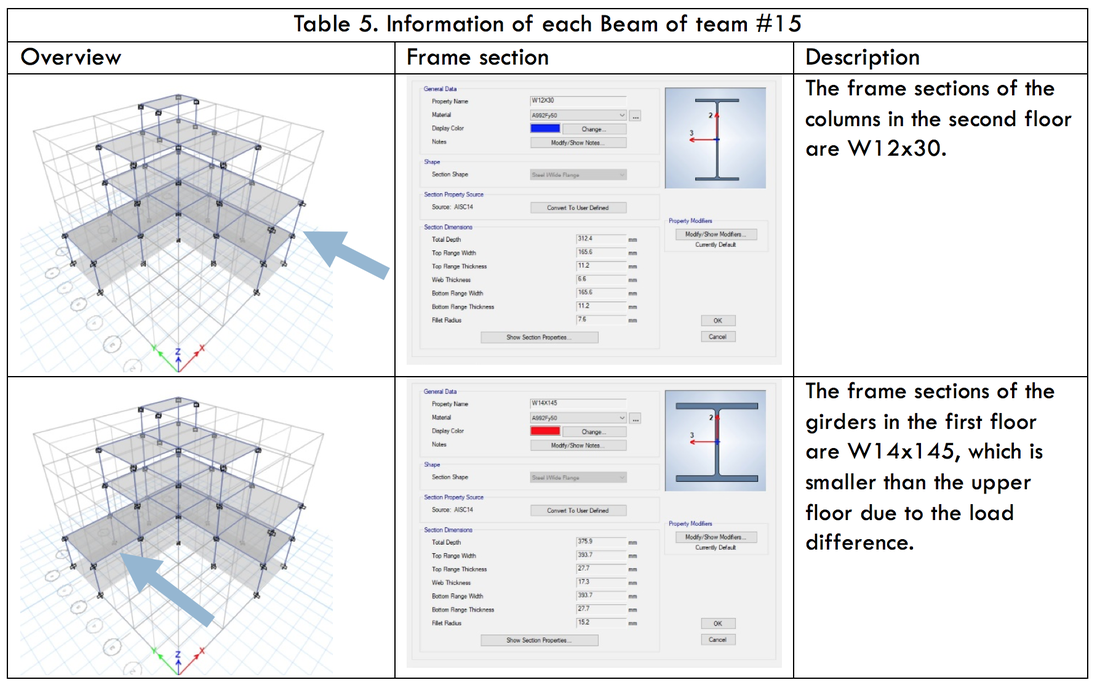
Team #15
This is the Revit model done by Cheng Kung University. The structure has three stories and 13 rooms for the residential purpose.
Revit Model by team #15
|
Structure Design of team #15
|
This is the ETABS model we made according to the REVIT model. We divided the plan into 9 sections to model it efficiently.
Quantity Take-Off
To complete the quantity take – off analysis, we collect the information about construction materials from the government open data source. As the picture below, there are plenty of useful martial price and also the floating range of them. There are two main materials we used the most in our construction design. The rate was floating during serval years; so we make the chart to make sure we get the right information that follow the right tread.
We searched the public information on government websites and obtained price fluctuations of deck and H beam in the past two years. We plotted the data into trend lines and predicted their unit prices, which were 22,700 NTD per tons and 22,100 NTD per tons respectively.
TOOLS
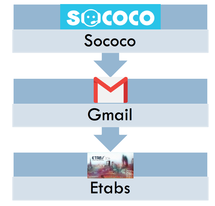
We use Sococo for the kick-off meeting, and then Gmail for discussion. After fully discussed, we started to use Etabs to model and analyze the structure.
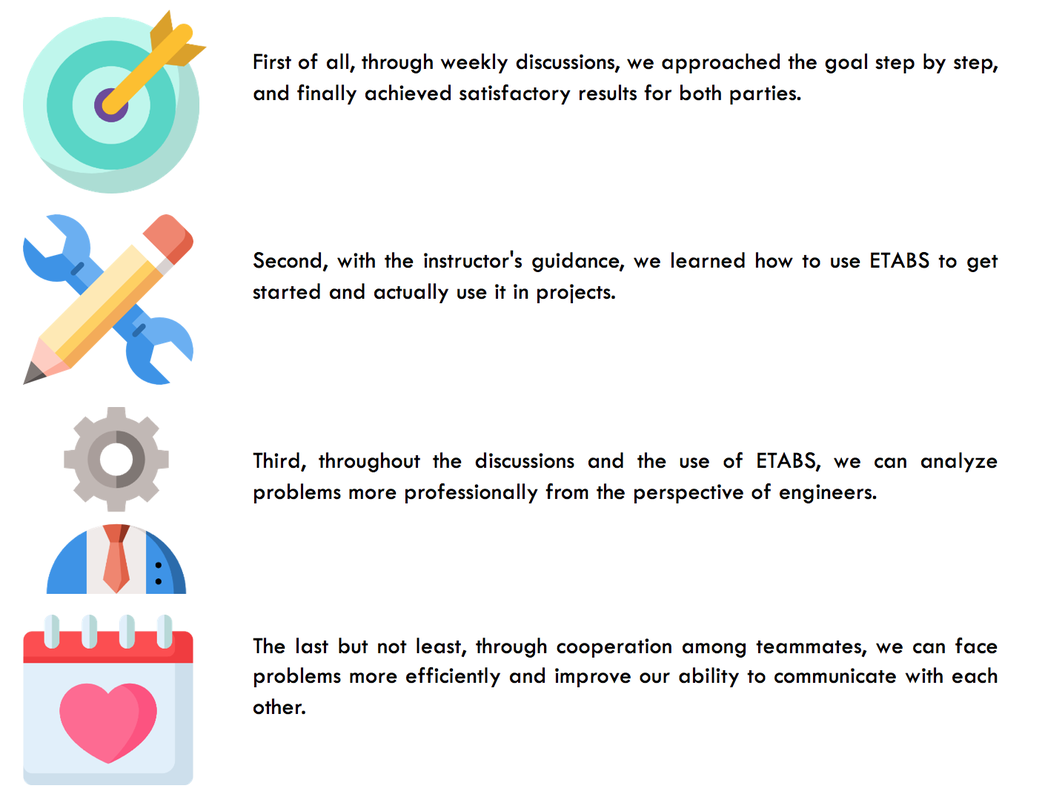
Key Factors Toward a Successful Collaboration Project
Through the whole process of this project, we’ve learn a lot from this experience. Four main points were shown below.